Getting Started with Basic Agents
Learn how to create a basic AI agent that can answer questions using your content—and share it, embed it, or connect it wherever you need.
What is an Agent, and Why Use One?
An agent is like a smart assistant that can answer questions and help users—powered by AI.
In Optimly, you can create these agents to:
- Answer questions based on your own content (like PDFs, websites, or documents).
- Help customers, teammates, or users get fast and helpful responses.
- Learn what people are asking and improve your content or support.
Think of it like having a supercharged FAQ bot—but one you can train in minutes and monitor in real time.
There are different types of agents depending on how you want to use or share them. A Basic Agent is the simplest way to get started. You can use it privately or share it through a link with anyone—no coding or installation required.
Setting Up a Basic Agent
To create a Basic Agent:
- Go to the Agents section of your Optimly dashboard.
- Click + Add.
- Select Basic Agent.
You’ll then go through the following configuration steps.
1. Knowledge Configuration
Before your agent can answer questions, you need to ground it with relevant knowledge sources.
Supported knowledge sources include:
- PDFs and text files
- Google Drive documents
- Website URLs
- YouTube videos
- Custom FAQs or structured knowledge bases
These sources help the agent answer with greater accuracy and relevance.
2. Agent Configuration
Define how your agent should behave and what powers it.
Main configuration options:
- Behavior: Describe your agent's tone, personality, and response style. Use the prompt generator to help write clear instructions.
- Model: Choose the LLM backend (e.g., GPT-4, GPT-4o mini). Different models have different costs and capabilities.
- Knowledge Restrictions: Decide if the agent should only answer based on your uploaded content. You can also define fallback behavior if no relevant knowledge is found.
- Automatic AI Responses: Control whether your agent responds automatically or requires manual responses. When disabled, all new conversations will wait for you to reply manually.
- Accessibility: Choose between public, password-protected, or private access.
- Domain Settings: Set up a custom subdomain (e.g.,
https://agent.yourdomain.com) for white-labeled sharing. - Emoji Support: Enable or disable emoji use in agent responses.
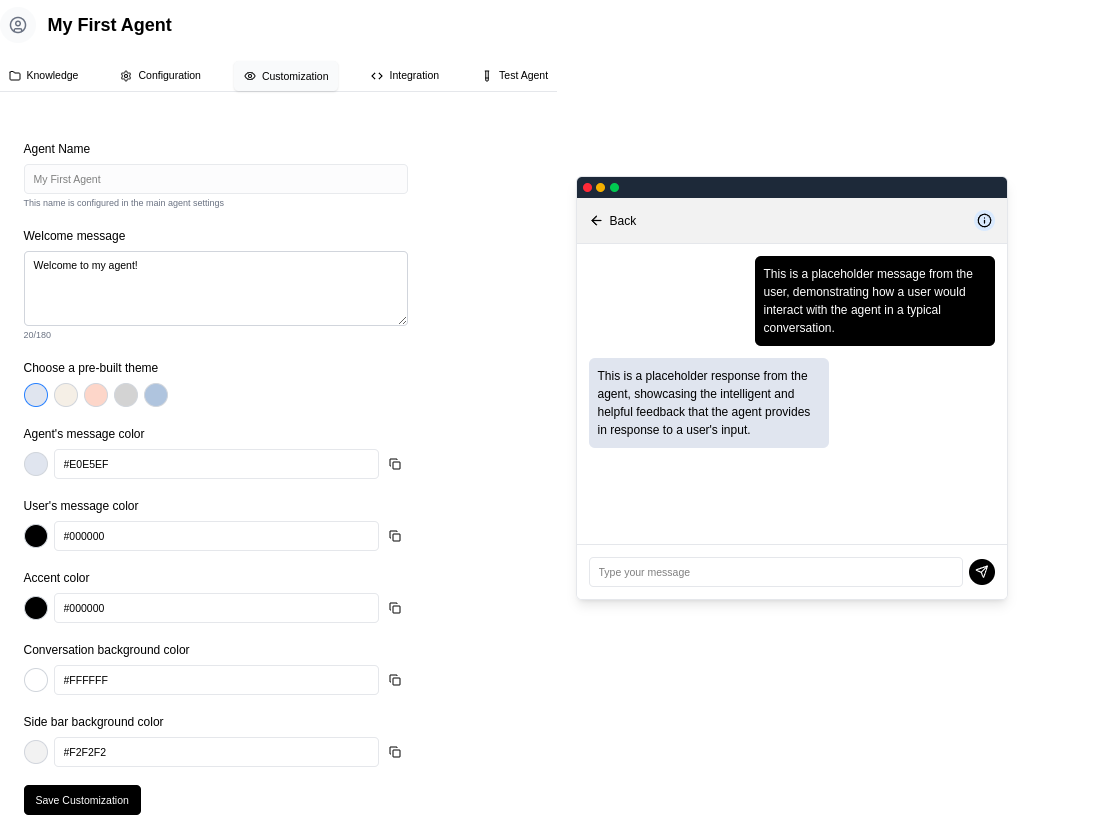
3. Customization
Make your agent visually consistent with your brand or use case.
Customization options include:
- Agent Name: Choose a name that reflects the agent’s function.
- Welcome Message: Set an optional greeting message that appears when a user opens the chat.
- Theme Selection: Pick from pre-built color schemes or define your own using hex codes.
- Appearance Settings: Adjust fonts, colors, backgrounds, and layout using a live preview window.
Manual Conversation Control
Optimly gives you complete control over when your agent responds automatically and when you want to handle conversations manually.
Agent-Level Control
In the Configuration tab, you can set the default behavior for all new conversations:
- Automatic AI Responses Enabled: Your agent will respond to all incoming messages automatically (default).
- Automatic AI Responses Disabled: All new conversations will be saved for manual response. The agent won't reply until you send a message.
This setting becomes the default for all new conversations, but you can override it for individual conversations at any time.
Per-Conversation Control
You can take control of any conversation at any time:
- Go to the Conversations section from your dashboard.
- Select a conversation.
- Toggle the Manual/AI switch to change the mode:
- AI Active (blue badge): The agent responds automatically.
- Manual Mode (orange badge): You control the conversation and send all responses.
When to Use Manual Mode
Manual mode is useful when:
- A conversation requires human judgment or empathy
- You need to handle sensitive or complex situations
- The agent can't find an appropriate answer
- A customer specifically requests to speak with a human
- You want to personally handle high-value leads or VIP customers
Sending Manual Responses
When manual mode is active:
- Messages from users will appear in your conversation view
- The conversation will show a "Manual mode active" indicator
- Type your response in the message box
- Press Enter or click Send to deliver your message
- Your message is sent through the same channel (WhatsApp, website widget, etc.)
Switching Back to AI Mode
When you're done with a conversation:
- Toggle the Manual/AI switch back to AI Active
- The agent will resume automatic responses
- The conversation continues seamlessly
Note: You can switch between manual and AI mode as many times as needed. Each conversation maintains its own setting independent of other conversations.
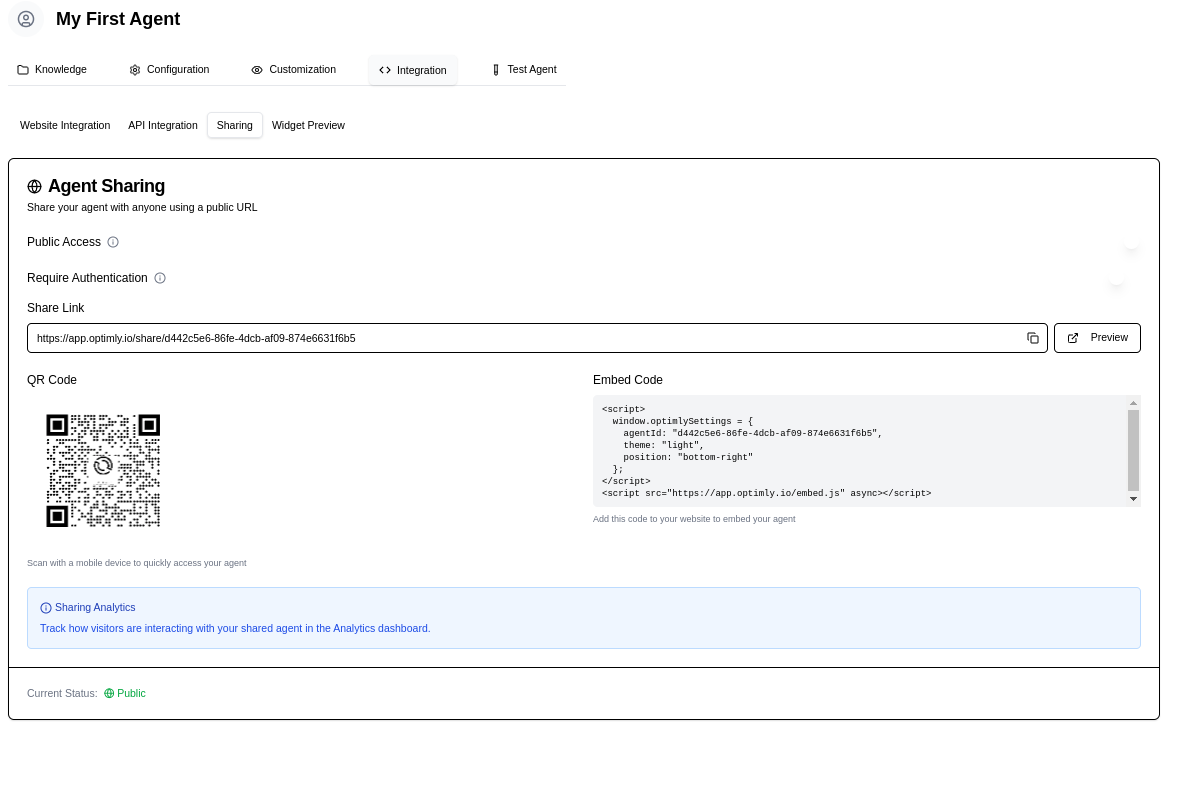
Sharing Your Agent
Once configured, you can share your agent through a direct link.
To share:
- Click the
...menu on the agent card. - Select Copy share link.
- Send the link to anyone who should have access.
You can manage accessibility settings to control who can interact with the agent.
Viewing Conversation History
You can review all past interactions with your agent:
- Click the
...menu on the agent’s card. - Select Conversations.
You’ll be redirected to the Conversations page, where all user-agent exchanges are stored and available for analysis.
Need help setting up your first agent? Contact support or visit the Getting Started page.